
Question
We are using a shared screen scheme across multiple projects. How do we make changes to one project without impacting others?
Answer
It’s great that multiple projects share schemes! Sharing schemes is the goal. Whether it’s screens, issue types, workflows, or other settings, Jira maintenance is easiest when schemes are shared. But sometimes, there’s a business need for one project’s settings to differ from the rest. In this situation, the answer is to create new schemes and associate them with a specific project. Now you can customize that project without impacting other projects.
About Schemes
First, let’s discuss schemes in general. A scheme is a configuration or collection of settings. There are schemes for issue types, workflows, screens, fields, priorities, issue security, notifications, and permissions. In this post, we’ll tackle the most confusing Jira configuration area. We’ll explore the screens, screen schemes, and issue type screen schemes pages in the administration area.
Screen Settings
Note: Schemes apply to Jira Server, Jira Data Center, and “Classic” projects in Jira Cloud. “Next-gen” projects in Jira Cloud are schemeless.
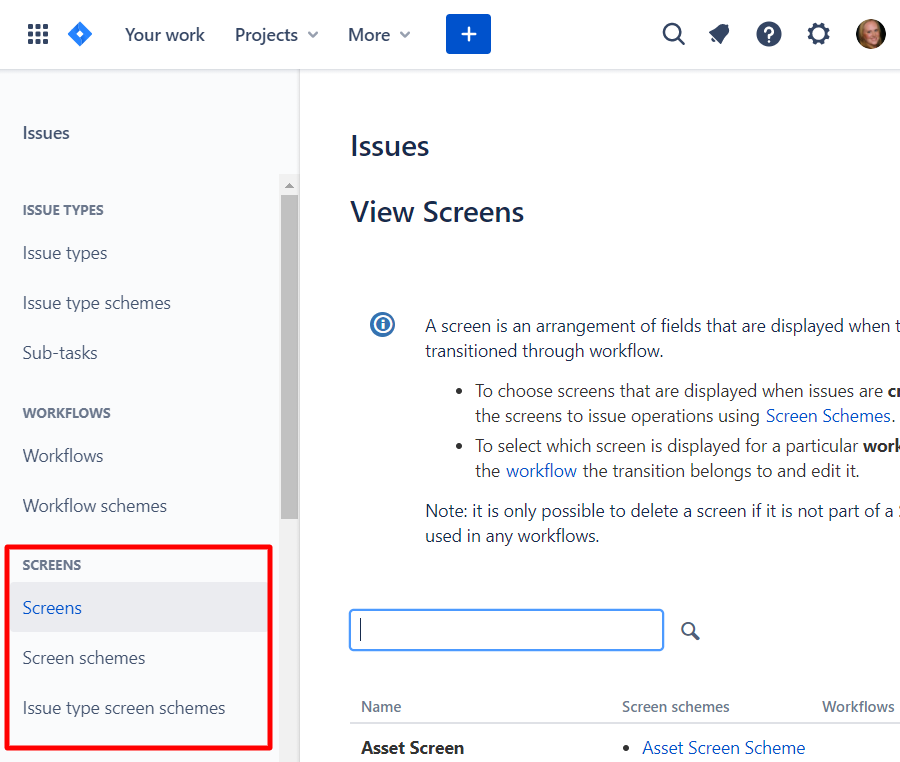
Screens

Screens define which fields are present and their display order. In the example, one screen has the “Story Points” standard field and the other screen has the “Steps to Reproduce” custom field.
Screen schemes
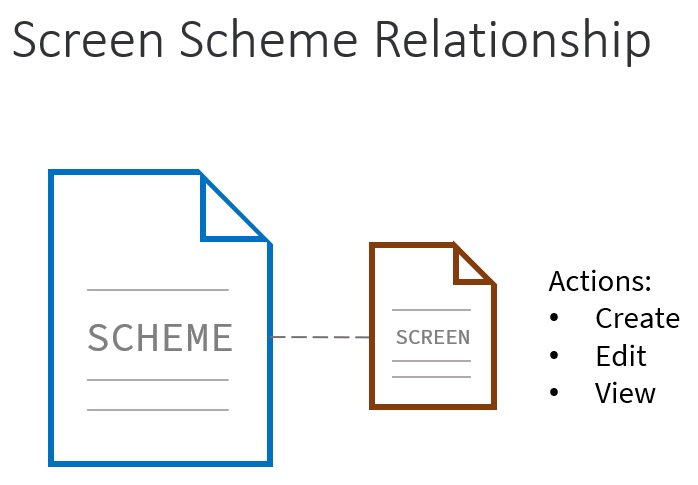
Screen schemes associate screens with the three issue actions: create, edit, and view. In the example, there’s one screen for all actions but a screen scheme can have 1, 2, or 3 total screens.
It’s a best practice to limit the number of fields on the create screen and only show fields the reporter can complete. Since an issue’s reporter doesn’t usually schedule work, omit fields like “Fix Version” and “Due Date” on the create screen. Show these fields on the edit and view screens instead. Screen schemes make it possible to show different fields for different actions.
Issue type screen schemes
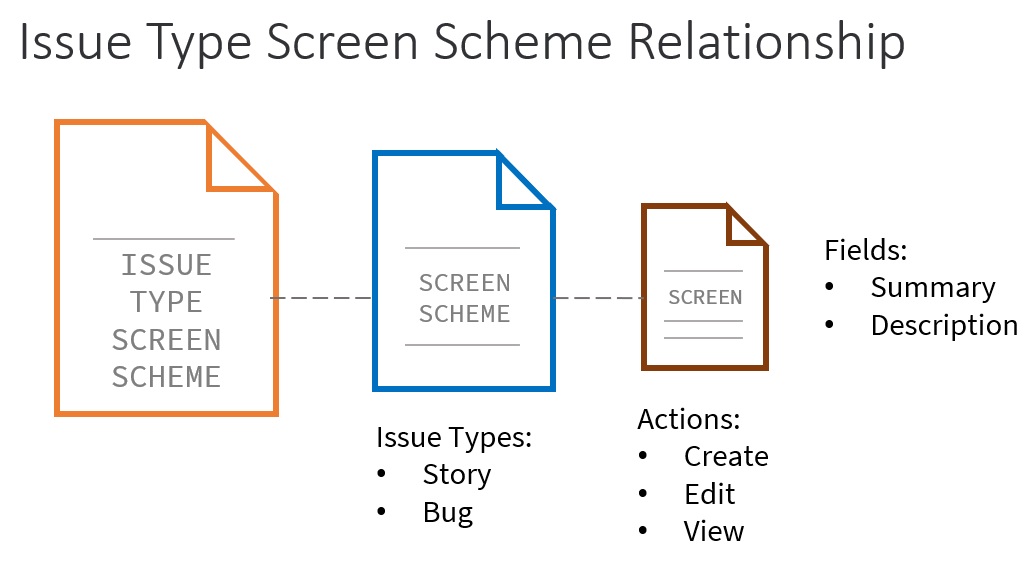
This scheme associates screen schemes with different issue types. In the example, there’s one screen scheme shared by the Story and Bug issue types. A project can have one screen scheme per issue type or fewer schemes. Fewer schemes are always easier to maintain.
Alternatively, you can have different screens for each issue type. For example, the Bug screen scheme may contain a screen with fields like “Steps to Reproduce” and “Expected Result”.
Regardless of the number of screen schemes and screens, a project can only have one issue type screen scheme.
Common Example
Here’s a more complex but common example.
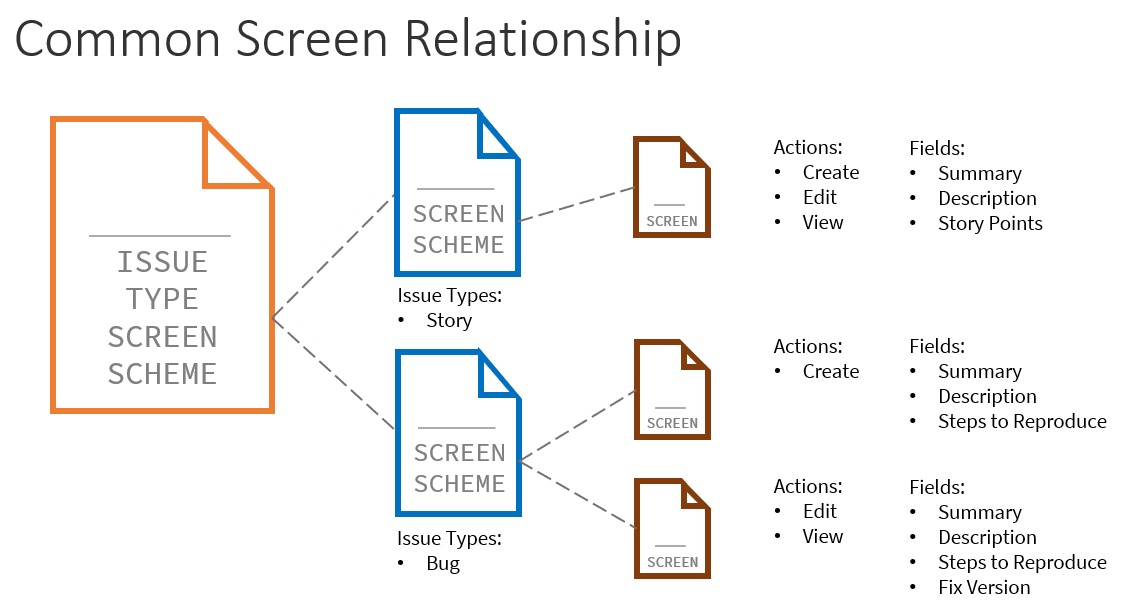
In the example:
- The issue type screen scheme contains two screen schemes.
- The first screen scheme at the top is for the Story issue type.
- It has one screen for all issue actions and contains three fields.
- The second screen scheme at the bottom is for the Bug issue type.
- It has two screens.
- The first screen at the top is for the create action and contains three fields.
- The second screen at the bottom is for the edit and view actions and contains four fields.
How to Decouple a Project
Here’s the simple scheme relationship example again. There’s one screen scheme for all issue types and one screen for all actions. This means all issues have the same fields.
Let’s imagine, all projects share these settings but we want to add a custom field to only one project. Here are the steps to create the needed schemes and decuple a Jira project.
- Create a new screen or copy an existing one
- Add the custom field to the new screen
- Create a new screen scheme or copy an existing one
- Associate the new screen with the new screen scheme
- Create a new issue type screen scheme or copy an existing one
- Associate the new screen scheme with the issue type screen scheme
At this point, we’ve created new schemes, but they are unused and don’t impact any Jira projects or issues. The last step is to associate a project with the new issue type screen scheme. This change does impact Jira data.
- Go to the Jira project to modify and click the “Project Settings” link in the left sidebar
- Click the “Screens” link in the left sidebar
- At the top right, click the “Actions” button and select “Use a different scheme”
- Choose the new issue type screen scheme and click the form submission button
Finally, check your work by verifying the new field displays when creating or editing issues in the updated Jira project.
Huh?
Still confused? Don’t worry! This was the hardest part of Jira administration for me to understand. It will make more sense after you’ve practiced these types of changes in the application. Use your Jira test environment to experiment with these settings until they make more sense. Once you understand all the screen settings, the other scheme relationships (ex: workflows) will make more sense too.
Need advice for screens and fields? Check out the Better Form Design in Jira series.
Have a Question?
Use the “Ask a Question” form on the top right and we’ll answer it in a future post.