Five Steps to a Successful Jira Upgrade

For most Jira Server users, an upgrade is a major activity that requires careful planning.  What is your upgrade plan?  How will you prepare?  How will you ensure success?  How often will you upgrade?

I approach upgrades as five high level steps:

Step 1:  Research

Conduct all pre-upgrade “what changed” and compatibility research

This very important first step can determine the success of your upgrade.  Start by reviewing the retrospective from the last upgrade so you can improve the upgrade process and plan for issues encountered in the last event.   Also, it’s a good time to make sure your emergency rollback plan is still accurate.

Next, read all of Atlassian’s “Release Notes” and “Upgrade Notes” for every version between yours and the one you’re upgrading too.

  TIP
Look for changes that might impact the application, users, or user behavior.  Look for bugs you’ve been waiting for fixes for.

Also read the Security Advisories, End of Support announcements, and End of Life policy.

  TIP
Ask your REST API and database users to read the Atlassian documentation too, so they can prepare for any changes needed in their applications.

After, verify the compatibility of your hardware, operating system, database,  java version, add-ons, and any internally developed customizations.  Resources:  Jira Requirements, Supported Platforms, and Checking Add-On Compatibility

Finally, double-check that your license is valid through the upgrade testing period and you are not about to reach your license limit.   You don’t want license issues to delay your upgrade.

Step 2:  Pre-Upgrade Tasks (Test Environment)

Copy all production data to lower environments, update plugins, upgrade and test

  RECOMMENDATION
Don’t have a test environment?  Remedy that issue first!  Ideally you’ll have a secondary server instance but if that’s not possible at least create a local instance on your personal computer.  Make sure the resources powering your test environment match your production environment as much as possible.  Make sure the software version and configuration are an exact copy of production.

  RECOMMENDATION
Before upgrading your test environment, be sure to copy all of your production data to the environment.  It’s not enough to test an upgrade on a vanilla instance; you need to test it with your specific configuration data!

By now you should know which version you’re able to upgrade to.  Download the installer file, stop the application, and run the binary.  Document the installation process, so you can repeat the steps in production.  Review all configuration files, paths, custom files, and settings for accuracy.  Also check the logs for major problems.

If all is well on startup, it’s time to update the Universal Plugin Manager, other add-ons, and re-index.  After the re-index, start your regression testing.  Make sure all basic application functions and new features are working as expected.

 MISTAKE
During testing, I discovered one of my heavily used plugins wasn’t compatible with the upgrade version and had moved from free to paid.  I clicked the “Buy Now” button on the “Manage add-ons” page, assuming it would take me to a shopping cart with pricing information.  Instead, it immediately installed an unlicensed version of the new plugin code!  All of our workflows broke and I was inundated by reports of license errors from users.  I had to quickly generate a free trial code to restore functionality and sheepishly contact the purchasing department to secure emergency funding for the new plugin.  I did all this in production!  #facepalm

Finally, contact your REST API and database users so they can verify all is well with their applications.  Also, compile any “new features” documentation to share with end users.  Conduct an end user and project-level admin demo if UI or feature changes are substantial.

Step 3:  Upgrade Preparation

Line up support resources, schedule production upgrade activities, and announce plans

At this point, you are confident in the stability of your test environment and ready to schedule the production event.  Start by identifying an upgrade team.  Who will execute the upgrade?  Who will “smoke test” the major functions?  Who can you contact if there’s emergency?

After you have your team assembled, pick an upgrade time outside of peak use hours.  Communicate the upgrade date, time, and expected duration to users and any support teams, like the company help desk or network operations center.  Don’t surprise these teams with “Jira is down!” reports during the upgrade window!

  TIP
Use Jira’s announcement banner function to communicate upgrade plans.

Sample Code:
<div style=”border: 1px solid #9e1c1c; background-color: #fff; padding: 10px;”>Upgrade Outage
The upgrade will start on [day], [date] at [time] [timezone] and conclude before the start of business on [day], [date].  During the upgrade window: (1) you WILL NOT be able to login to JIRA, (2) any changes attempted WILL NOT be retained, (3) API calls will fail, and (4) issue creation via email will fail.  For a list of new features and fixes, see our JIRA Upgrade notes.

Download sample wording for your entire upgrade process from the Strategy for Jira store.

Step 4:  Upgrade Tasks (Production)

Backup production data, update add-ons, upgrade and test

  RECOMMENDATION
Hopefully you’re already taking regular (automated) backups of your database and file system.  But when’s the last time you verified that your most recent backup occurred and is actually usable?  Do that before proceeding.

At last, you’ve planned as much as possible, know what to expect, and are ready for the upgrade event!  It’s time to repeat the installation steps you practiced in your test environment including:  installation, add-on updates, and regression testing.  Use the notes you took in step 2 and be sure to address any differences that exist in the production environment.

Step 5:  Communication

Announce upgrade and communicate changes and benefits to user base

Finally, it’s time to announce the upgrade to users and complete post-upgrade steps.

  RECOMMENDATION
Use Jira’s announcement banner function to communicate the upgrade is complete.  Include a link to the “new features” documentation you compiled in step 2.

Review any previous trouble reports, in case the upgrade remedied them, and be ready to respond to new reports.  Check in with your REST API and database users, to make sure all is well with their apps.

Finish any outstanding tasks, compile your retrospective, and make any needed plan updates in preparation for the next upgrade.  Also be sure to thank your upgrade team!

Detailed Upgrade Plan
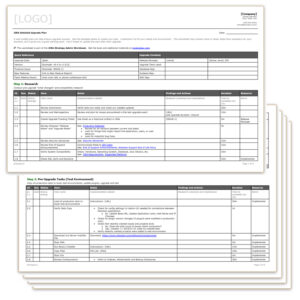
Jira Detailed Upgrade Plan

A well-crafted plan can help ensure upgrade success.  Download the sample upgrade plan worksheet.  Customize it to fit your needs and environment.  This worksheet may contain more or fewer steps than necessary for your situation, but it gives you a great starting point.  Don’t forget to update and improve the plan after each upgrade.

A test instance and a healthy application are the foundation of a successful upgrade event.  You’ll want to upgrade often for the newest features, fixes, and performance improvements.  Happy upgrading!
Too Much of a Good Thing: Alternatives to Jira Custom Fields

Customizing Jira for Business Teams

Jira is a great tool for business teams because it’s so easy to customize.  After all, the information a software team needs to track will be different from the information an HR team needs to track.  You can create custom fields to collect information that doesn’t fit in standard Jira fields, but be careful lest you fall into a murky swamp of slow performance and more custom fields than you care to manage.  In fact, Atlassian has identified the number of custom fields as the attribute which has the highest impact on the speed of the most common Jira actions.

Related:  Watch Atlassian’s Five Secrets of JIRA Performance at Scale

Wondering if you’ve got too many custom fields already?  According to Rachel Wright, author of the Jira Strategy Admin Workbook, load time of your screens and your custom field admin page are good indicators.  Also, note how long your custom field admin page scrolls.

What should you do if you’re committed to limiting the number of custom fields, but still want to take advantage Jira’s flexibility?  Who should decide when a new custom field is justified?  And what should the criteria be for that decision?

Start by putting a process in place that project leads can use for requesting a new custom field.  Use the ProForma process template or the Strategy for Jira worksheet to gather information such as the proposed field’s purpose, type, screen schema and any needed validation rules.

Then consider the following questions:

  • Will the new field be used by multiple projects?
  • Will you query issues based on this field?
  • Will you run a report of all the values in this field?
  • Will the field duplicate an existing field?  (Rachel recommends publishing a list of existing custom fields and their uses to encourage users to make the most of what’s already there rather than requesting new fields.)
  • Will it duplicate core Jira functionality?

If you determine that a new custom field is indeed needed, pay special attention to creating it with the correct field type, as this cannot be changed later.  Having the requestor provide examples of the data the field will hold will help ensure that you select the correct field type.  (Or maybe you can suggest a better way to track the info altogether!)  Give the new field a generic name so that it can be used by more than one project.

Alternatives to Jira Custom Fields

Saying “no” to creating a new custom field, doesn’t mean you have to say no to giving users what they need.  You have a couple of other options for collecting the same data:

  • Use a standard field for a custom purpose
    Standard Jira fields can be manipulated to collect different data for different projects. For example, the Jira field “Labels” can be used in different ways by different teams.  A marketing team using Jira to track their production of marketing assets could use the Labels field to record the marketing campaign an asset is associated with.  The same field might be used in a different project, by the facilities team, to record locations.  You can use a field configuration to set a project-specific description of what should be recorded in the field, thereby prompting users to put in the right information.
  • Adapt an already existing custom field
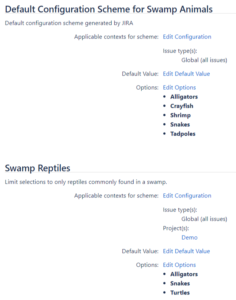
    One custom field with two contexts

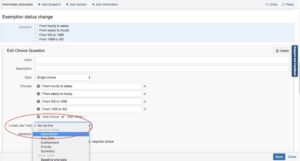
    Field contexts can be used to make an existing custom field serve different functions in different projects.  Field contexts allow you to set a default value and a defined options list for the field within a given project and with a given issue type.  For instance, you could create a custom field called “category”.  The HR team might use this field to store employment status and might have four options (full time, part time, intern, contractor) to select from, with “full time” set as the default value.  The finance team could use the same field in their project, but the options could be set to record different payment methods (EFT, check, purchase order, etc.)

  • Use a ProForma form
    Another option is to collect the information on a form.  Forms are an easy way for business teams to collect exactly the information they need without requiring changes and customizations to your Jira configuration.  Teams can design, build and deploy forms that gather data structured to their needs and validated with their business rules.  Many of the data points required to fulfill a request don’t need to be queried or reported on.  For those that do, the ProForma form builder makes it easy to “pipe” information from a form field to a Jira field.
Piping For Data Jira Fields in ProForma

Finding the balance that allows you to maximize Jira’s flexibility without sacrificing performance is a key consideration when expanding Jira to business teams.  ProForma can help.

Best Practices for Creating a Custom Workflow

If you’re on a software team, you probably use the default Jira workflow or something close to it.  But what if you’re on a business team or the default options don’t fit the way you want to work?  Then it’s time to create a custom workflow.

A workflow is a standard set of statuses (steps) and transitions (movement between steps) that each issue follows in its lifecycle.  Statuses take an idea from “conception” to “completion”.  Each Jira project can have its own workflow and each issue type within a project can have its own workflow as well.  For example, the Legal team has a specific process for contract review and a general process for all “other” types of requests.  Their Jira project might include issue types like the standard “Task” and a custom type like “Contract.”

  • The “Task” issue type has a very simple workflow, with the statues “To Do” and “Done.”
  • The “Contract” issue type requires additional statuses for approval and execution steps that occur in a contract review process.

  RECOMMENDATION
In the beginning, keep workflows as simple as possible, until you’ve uncovered a deficiency or process step that needs special attention.

Custom Workflow Tips

The steps below outline the best practices for creating a workflow:

  1. Before creating a new custom workflow, have the user explain their real life process to you.  The workflow should be as simple as possible.
  2. First, draw (preferably on paper) a workflow to ensure it makes logical sense and all forward and back transitions are accounted for.  You can use the “Custom Workflow Documentation” template in the Jira Strategy Admin Workbook or in ThinkTilt’s Process Template library as a way to communicate and document workflows.
  3. After drawing the workflow, write the workflow out in words. This can uncover additional needs you may have neglected to draw or consider.
  4. Include logical backwards transitions so users can self-manage issues.
  5. Give users options to abandon or stop progress on issues at appropriate times.
  6. Give project-level administrators appropriate options to fix improperly transitioned issues.
    • Example:  Include a “reopen” transition button in the final status to address issues that were improperly closed.
  7. Use transition conditions sparingly.  If a condition is needed, set the restriction to a project role, rather than to an individual, for easy maintenance.
  8. Use transition validators and post functions to minimize the amount of manual work a user has to do.
    • Automatically assign an issue to the reporter when moving to an “information needed” or “verification needed” type of status.
    • Automatically assign an issue to the Project Lead in a “triage” type of status.
    • Automatically move a parent issue to “In Progress” when a child issue starts progress.
  9. Name your statuses:
    • Name statuses so they reflect the current state.  Good status names immediately tell a user what is occurring and what state an issue is in the workflow process.  For example, “Pending Review”, “In Review”, “Being Reviewed”, “Awaiting Review”, etc.
    • Make any status names short and easy to understand what is happening.  Long, multi-word names are harder to query and may be truncated on certain screens.
  10. Name your transitions:
    • A Transition name should be short and reflect an action taken.
    • Good transition names immediately tell a user what action to perform to progress an issue.  Example:  For an issue in “Pending Review” status, a good transition name would be:  “Review Complete.”  If you need a “pass/fail” situation, where an action must pass a test before a transition can occur, good transition names would be:  simply “Pass” and “Fail.”
    • Bad transition names confuse the user about how to move forward.  Example:  “Review.”  A transition button should signify the start or end of an action.  The word “Review” is ambiguous.  If a user clicks “Review,” does that mean they should start a review or that the review has already occurred?

It’s easy to customize workflows and therefore easy to go overboard, creating more structure than you really need.

Phased Approach

It’s certainly possible to capture every little step in your work process and build that into a complex and long Jira workflow.  An alternative however, is a phased approach.  Simply break your process into phases that represent a collection of smaller steps.  The phases represent key decision points. An issue can’t be moved to another phase until the requirements of that phase have been satisfied.  Your Jira status represents the entire phase, rather than a status for every small step in the phase.

Example:  Your company is signing a partnership agreement 
The contracts process requires a review of the contract by both parties and potential edits before final execution.  It’s a predictable process requiring a short workflow like:

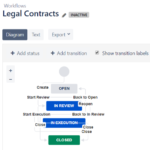
Open > In Review > In Execution > Closed

Sample Legal Contracts Workflow

  TIP
A generically named status like “In Review” is better than a legal-specific name like “In Contract Review”.  Other Jira projects can use the generic version regardless of what type of thing needs review.  You want to share assets and schemes between projects as much as possible.

The Legal team is doing many things in the background that may not need to be reflected in the workflow.  For example:

In the “In Review” phase, the Legal team is reviewing the contract, researching legal topics, communicating with internal teams, negotiating terms with the external company, etc.

In the “In Execution” status, the CEO is finding his favorite signing pen, both companies are trading paperwork, and your Legal team is entering the final result into their contracts database.

In the above example, is it useful to create a status for every step that occurs in the contracts process?  Do you need to track how many times the contract was modified during the review process?  Do you need to track which parties have signed the agreement so far?  If the answer is “no” a phased approach may be more useful.  Also, it might be more useful to track signature collection in a custom field.

  RECOMMENDATION
If you’re not going to report on something (ex: “How many contracts have been signed by us?” in the above example) that status or custom field may not be necessary or useful.

Don’t over-complicate your custom workflow with steps and statuses you don’t really need.  Your end users will thank you for it.

System, Application & Project Admins: Who Does What in Jira?

I was recently asked:  “If Jira project admins can now edit their own workflows and screens, what’s left for the application admin to do?”  Plenty!  Application admins are still very much needed, and their work extends way beyond managing a Jira project.  Further, the new project admin abilities aren’t as liberating as they may sound.  Let’s examine the types of admin users.

Types of Jira Admin Users

There are many different types of Jira admin users and responsibilities vary depending on the type.  Admin users generally fall into one of the following categories:

  • System Level Administrators – Users with the ability to perform absolutely every Jira administration function
  • Application Level Administrators – Users with permissions to perform most Jira administration functions
  • Project Owners or Leads – A project’s single point of contact, often responsible for project strategy decisions
  • Project Level Administrators – Users with permissions to manage settings for individual Jira projects.  (Example: Components, project users, etc.)

While the admin types have distinct abilities, a user can be multiple types of administrators at the same time.  For example, an application administrator may also be the owner of a specific Jira project.   An application administrator could be a system administrator as well if those roles have been combined.  For the differences between application administrator and system administrator permissions, see the “Managing Global Permissions” documentation.

Jira Admin Responsibilities and Abilities

Each admin level has a distinct set of responsibilities.  Below we’ll address the four admin types as two levels:  system/application and project.

System Level Administrators & Application Level Administrators

These administrators need to consider the health of the application, impact to the application, and maintenance implications for each decision and change they make.  These admins need to be chosen carefully, audited regularly, and approved by the application owner.

Application admins typically have the following responsibilities:

  1. Assist the Jira Advisory Board in maintaining established standards
  2. Communicate standards, procedures, changes, and maintenance outages to your Jira Ambassador team and end users
  3. Assist end users with user-specific settings
  4. Assist Project Level Administrators with managing settings and maintaining their projects
  5. Complete approved customization requests or suggest alternative solutions within established standards
  6. Manage users, groups, and access
  7. Create and configure new projects, schemes, and assets
  8. Remove projects, schemes, and assets when they are no longer needed
  9. Perform application upgrades
  10. Vet, install, and upgrade apps, plugins and integrations
  11. Check logs for and address errors
  12. Develop and maintain documentation and end user training materials
  13. Monitor and ensure the overall health of the application

Download this list as a worksheet at: jirastrategy.com/link/admin-responsibilitiesTip:  Turn this worksheet into a Jira Admin job description!

Project Owners & Project Level Administrators

Each Jira project has a listed “Owner” or “Lead” who is sometimes also the default issue assignee.   Additionally, individual projects can have an unlimited number of administrators.  As  such, there’s an opportunity to involve additional users in project-level maintenance and  management.

Project admins typically have the following responsibilities:

  1. Set and maintain Components, Versions, and other project-specific settings in accordance with established standards
  2. Manage users and groups in the “Users and roles” area
  3. Routinely triage (or appoint a triage person) to assign and review issues as they are created
  4. Maintain the data and accuracy of data in the project space
  5. Report any project issues or customization needs to the Jira Support team
  6. Respond to questions or approvals requested by the Jira Support team

additional Editing Abilities

Additionally, project admins have limited workflow editing abilities in Jira version 7.3 and limited screen editing abilities in version 7.4.  Also in 7.4 these abilities can be enabled or disabled through Permission schemes.

Project admins can only utilize assets that already exist.  For example, they can add an existing status to their workflow or an existing custom field to a screen, but they cannot remove a status, create or rename statuses, or create new custom fields.  They can modify transitions, but not edit transition screens or transition behaviors (properties, conditions, validators, or post functions).  Further, these editing abilities only apply to projects where the workflow and the screens are not shared with other projects.  If you’ve been sharing project configurations, as highly recommended in the Jira Strategy Admin Workbook, it’s possible that few or none of your project admins will have these new editing abilities.  Additionally, the default workflow and default system screen still cannot be edited by anyone.  Read more about these features in the 7.3 and 7.4 release notes.

How to check for Workflow Editing Abilities

  1. Use the Admin UI
    If you have few workflows, you can manually look for ones that are only used by one project.  In the Jira Admin UI, visit Admin > Issues > Workflows.  Click the “View” link next to each workflow.  The following page will show how many projects use the workflow.
  2. Use Atlassian’s Script (Jira Server Only)
    Atlassian created an admin helper script to detect workflows and administrators impacted by the 7.3 change.  The script requires node.js and you must be able to execute it on your server.
  3. Use the Database (Jira Server Only)
    This method is not perfect but it got me to the data I needed.  Work with your database team to improve the sample queries or format them for your database type.

First, I counted the number of projects used by each workflow, looking for any that are not shared (those with a project count of 1.)

Sample Query:  SELECT wse.workflow, count(p.pname) AS `Projects Using Workflow` FROM nodeassociation n INNER JOIN project p ON p.ID = n.source_node_ID INNER JOIN workflowscheme ws on ws.ID = n.SINK_NODE_ID INNER JOIN workflowschemeentity wse on wse.scheme = ws.ID WHERE n.source_node_entity = ‘Project’ and n.sink_node_entity = ‘WorkflowScheme’ GROUP BY wse.workflow ORDER BY `Projects Using Workflow`, workflow;

Next, I retrieved project details for each of the not shared workflows.  I mainly wanted to know the project id, project name, and lead.

Sample Query: SELECT p.id AS project_id, p.pname AS project_name, p.lead AS project_lead, ws.name AS project_associated_workflow_scheme, wse.workflow AS workflow_scheme_associated_workflow FROM project p LEFT OUTER JOIN nodeassociation na ON na.source_node_id = p.id AND na.sink_node_entity = ‘WorkflowScheme’ LEFT OUTER JOIN workflowscheme ws ON ws.id = na.sink_node_id LEFT OUTER JOIN workflowschemeentity wse ON wse.scheme = ws.id LEFT OUTER JOIN jiraworkflows jw ON jw.workflowname = wse.workflow WHERE  wse.workflow = ‘Workflow Name 1’ OR wse.workflow = ‘Workflow Name 2’ …

I put all the info into a spreadsheet for further analysis.  From this abbreviated workflow and project list, I was able to examine individual project settings, like screens and permission schemes, to determine who would be able to take advantage of additional project admin features.

Deciding exactly what you want project admins to do may require experimentation as you adjust to the possibilities of Jira 7.3 and beyond. Ultimately, you’ll want to maintain a balance between providing ease and flexibility while still maintaining standards and control at the system/application level.

What other duties do application/system and project admins have at your company?  What’s your strategy for communicating responsibilities to users?  Can you improve any of the workflow editing ability detection methods?  Add your thoughts to the comment section below.

Who’s in Charge? Jira Governance for Business Teams

Getting off to the right start is always the best way to go.  It’s not always reality.  We usually inherit things – business processes, Jira applications, our parents’ bad habits, etc.  In her excellent resource, the Jira Strategy Admin Workbook, Rachel Wright recommends starting out by creating a Jira Advisory Board.  If you’re starting from scratch, this is a great first step.  If you’re already using Jira, now might be the time to put your Board in place, especially if you’re considering expanding Jira to other teams in your organization.

Different organizations have different ways of governing their processes. Rachel recommends that the role of the Advisory Board include:

  • Deciding what customizations to create and support in order to strike a balance between giving teams what they need and maintaining a manageable, high-performing application.
  • Setting standards for privacy, security, and storage and handling sensitive information.
  • Developing a process for providing support for teams’ Jira projects.
  • Determining what a successful Jira application looks like.  What metrics will define success?

Who Should be on the Advisory Board?

When you consider how powerful and mission critical Jira can be for your organization, it’s clear that it shouldn’t be directed by just one person.  But who else should be on your Board?  Rachel recommends a group of about five people including:

  • An end user – techy-minded or not
  • A Jira Administrator who understands the application’s capabilities
  • A Project Manager, Business Analyst or Strategist – basically a process-oriented person
  • A high level manager or VP who’s ultimately responsible for the work that gets done in Jira
  • A wildcard member to keep everyone on task

Consider having your end user or your wildcard member come from a non-technical business team.

Why Create a Jira Advisory Board Now?

You’re probably thinking, we’ve managed this long without a Board, why do we need one now?  If that’s the case, one of two things is probably happening.  Either your Jira Administrator is handling everything on their own, trying to please everybody, and relying on their own knowledge for deciding what should and shouldn’t be implemented.  Or you do have a group of people who work together to set standards and support Jira users – you just don’t think of them as an Advisory Board.

If you don’t already have one, the moment of expanding Jira to business teams is an excellent time to establish a Board.  Here’s why you need one now, even if you didn’t think you needed one before:

  • Expanding Jira to business teams will mean more requests for customizations; more custom fields, more screen schemes, more configurations.  With each request, you will need to decide if it’s worth creating and supporting the new asset or whether an existing field, scheme or configuration can be shared.  You’ll come to better decisions if you include multiple points of view.
  • You’ll also be collecting more sensitive information.  Consider all the personal information HR keeps on employees.  You need a policy to determine what kinds of sensitive information can be stored in Jira. Expanding to business teams also means you’re inheriting all of the privacy and security standards that apply to those teams.  Again, you don’t want to be deciding how to navigate that alone.
  • Finally, teams may be skeptical as to how well a solution developed for IT can address their needs.  That’s understandable.  We’re all experts in our own areas.  Having an Advisory Board that includes non-techies will help people feel more assured that their needs will be considered.

Easily Convert Business Teams to Jira

Expanding Jira to business teams is a great opportunity to bring a tool you already know, love and support to wider use in your organization.  Teams from Finance to HR will love handling their requests in Jira, being able to measure and predict their workload using Jira’s reporting and knowing that their backsides are covered with Jira’s end to end traceability.

Along with making sure business teams’ conversion to Jira is done right (the reason you’re setting up that Advisory Board), it would also be nice to have it done easily.  This is where ProForma Forms & Templates for Jira can help.  ProForma offers a template library and an easy to use form builder that puts teams in control of collecting exactly the information they require, without the need for custom fields, screens and configurations.  You may actually find yourself doing less Jira admin even as you bring more teams into Jira.

You can help your business teams have it all:  a great tool, a well-governed application and an easy conversion.

Teaming Up for Jira Business Teams

Jira began as a tool for software teams but has evolved into a tool for any team!  Business teams can benefit from Jira’s task collection, lifecycle tracking abilities, and built-in reporting.  Whether you’re on a Marketing team launching your next campaign, a Legal team preparing your next agreement, or a Human Resources team supporting people and processes, any team can track their work with Jira!

ThinkTilt and Rachel Wright would like to see more teams experience the benefits of Jira.  That’s why we’ve formed a new partnership “teaming up for business teams” to help you get started, thrive, and conquer your team’s “to do” list.  We’re collaborating on a series of articles to help you on your way.  Additionally, some of the worksheets from the Jira Strategy Admin Workbook are being added to ThinkTilt’s Process Template library.

Even if your team isn’t technical you can still use high-tech tools!  Email distros, spreadsheets, and shared network drives – be gone!  Your team has a real issue tracking database now with Jira.

About ThinkTilt

ThinkTilt’s Jira app, ProForma makes it easy for business teams to build and deploy online forms, backed by Jira’s great workflow engine. Empower every team in your organization to take control of their processes and deliver first class request management. All the information you need, where you need it.

About Rachel Wright

Rachel Wright is an entrepreneur, process engineer, and Atlassian Certified Jira Administrator.  She is the owner and founder of Industry Templates, LLC, which helps companies grow, get organized, and develop their processes.  Rachel also uses Atlassian tools in her personal life for accomplishing goals and tracking tasks.  Her first book, the “Jira Strategy Admin Workbook, was written in Confluence and progress was tracked in Jira!

We challenge you to think of a type of team that wouldn’t benefit from Jira!

0
    Your Cart
    Your cart is empty. Go add some materials!Return to Shop