
New Course Just Launched – Complete Guide to Jira Administration: Configuration, Management, and Automation
After over a decade as a Jira administrator and multiple published books, I’ve finally created the course I wish I […]
After over a decade as a Jira administrator and multiple published books, I’ve finally created the course I wish I […]
Between March 2025 and July 2025 Atlassian progressively rolled out a new navigation experience to all Cloud users in Jira,
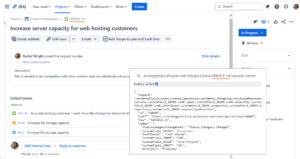
In the last article, I shared an easy way to find what you’re looking for by changing parameters in URLs
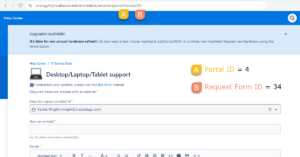
Who doesn’t love a shortcut? In addition to Jira’s keyboard shortcuts, another easy way to find what you’re looking for
CoursesLearn about Jira and Confluence BooksDownload manuals, worksheets, and materials ServicesGet consulting and Jira implementation help Latest Jira Content
Question I’d like to make one field dependent on the data in another field. How do I do that in
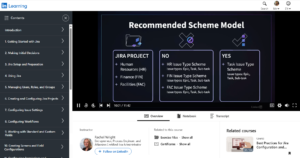
Let’s say you create specific Jira issue types because you want to collect a different data set for each type,
Life is short. Jira is complex. There simply isn’t time to make all of the mistakes and learn everything you
My new Jira: Advanced Administration course is now available! Take the course on LinkedIn now. Access to my courses and