
One of the principle advantages of using ProForma – the app that lets you create forms that embed in Jira issues – is that it allows teams to collect customized data without needing Jira custom fields. In the previous article in our series on reducing custom fields, we discussed how to delete, hide and merge custom fields. In this article, we’ll explore the fourth option – substituting a form field for a Jira custom field.
When to Use
This is the solution that provides the best of both worlds. You get to have the data without having the custom field. That being said, there are some limitations you need to consider before implementing this solution.
Limited Search Capability
Currently, fields on ProForma forms are not searchable in Jira. There are two ways you can work around this. For fields that are frequently queried and reported on, you can link a form field to a Jira field. This allows you to collect the data in one place and still have access via JQL queries and Jira reports. However, this doesn’t help as far as reducing fields.
The other option is to download a spreadsheet of forms responses and search there.
We are working on creating functionality which will allow you to link multiple form fields to one Jira field (for instance, the description field). This will allow teams to collect and view the information in a structured manner, while still having the data available for searching in Jira. We anticipate releasing this functionality in early 2019.
Conversion Process
The other thing to keep in mind is that the conversion process (described below) is not for wimps! We recognize that it’s a bit labor intensive and we are working to develop an automated process. (For this reason, it’s highly recommended that you triage incoming requests for new custom fields and use form fields in lieu of custom fields as much as possible.)
Preparing the People
Reassure users that they will still have the data. If users are new to ProForma, you want to show them how ProForma is used on another project in order to reduce their concerns. You’ll encounter less resistance if users understand that they’re not losing any data.
Second, knowing that the conversion is a bit involved, you should prepare your users to be patient. You will also want to work closely with Project Admins – letting them do some of the tasks (such as building the forms) – especially if you’re substituting fields across multiple projects.
How to Do It
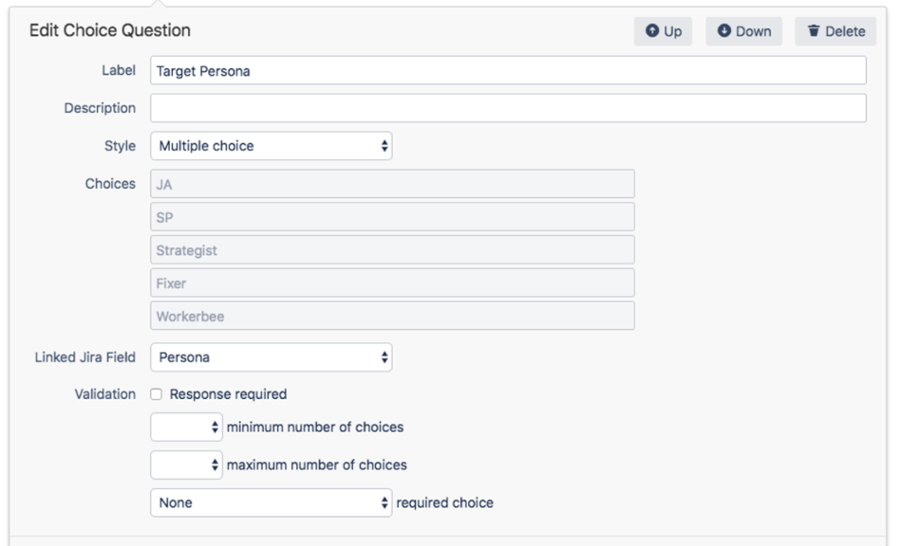
1. Build a form that includes the target fields. Each field has the option of being linked to a Jira field. Be sure to create a field for each custom field that you wish to eliminate. For each of these fields, use the Link Jira Field option to link the form field to the existing Jira custom field. Note that you may want to link other fields as well. For instance, it’s very useful to have a “What’s the problem?” field link to the Jira summary field.
- The form can include as many fields as needed (not just the fields that are being converted). Create forms that will be useful for the team after the conversion process is complete.
- You may be able to get a head start by modifying a form from the ProForma template library.
- Organize fields into logical sections. Add instructions. Use ProForma features such as validation, conditional logic and field-level hints/descriptions to make your forms as user-friendly and useful as possible.
2. Once the form has been built, you will need to add the form to all of the relevant issues. Depending on your situation, this could be every issue in the project, or only those issues that have data in the custom fields you’re converting. Currently, add ProForma forms to issues has to be done manually.
3. Next you need to go through and open each form and check that the contents are correct. The target form fields should contain the data from the custom fields. Save and Submit the form on each issue. Note that the data doesn’t get locked into ProForma until the form has been submitted.
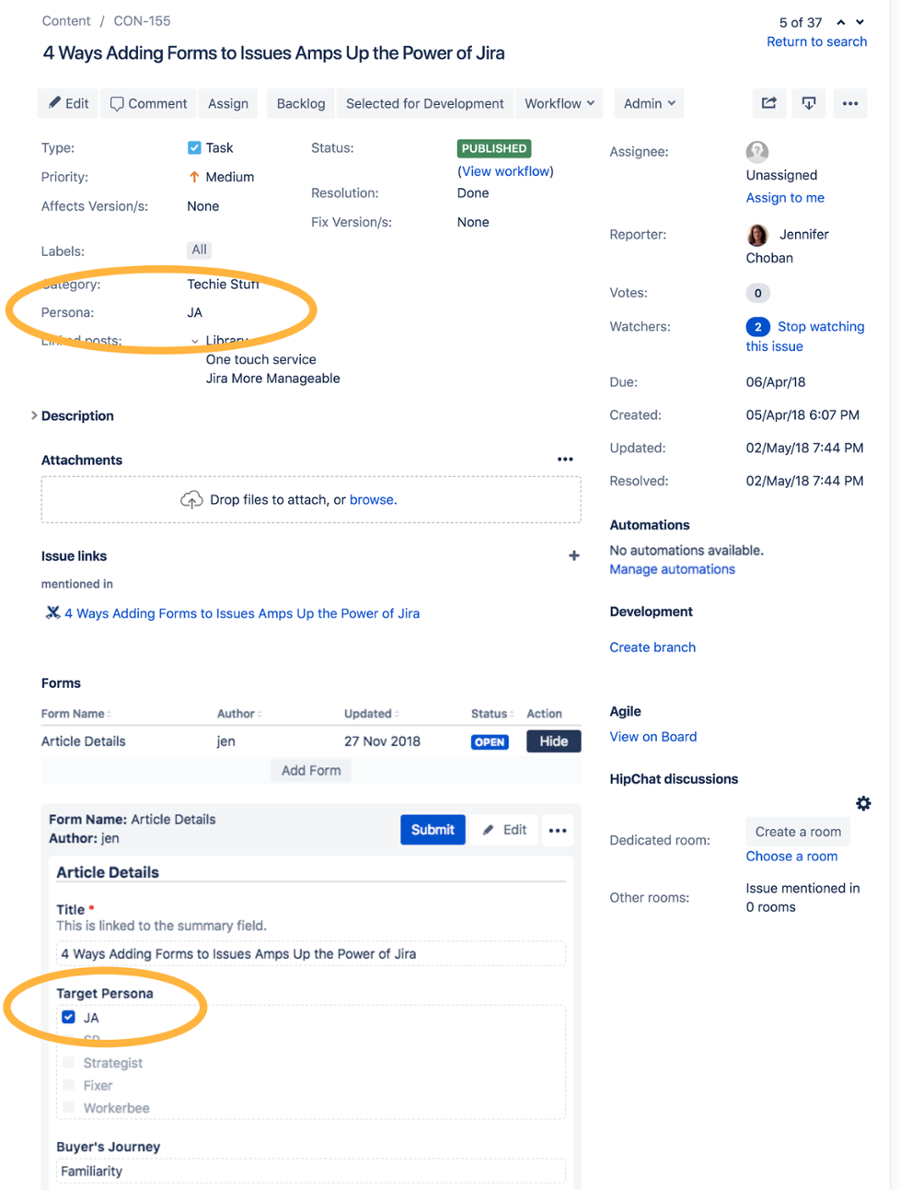
The data from the custom field is now present on both the custom field and the form. Be sure to click Submit to lock the data in the form.
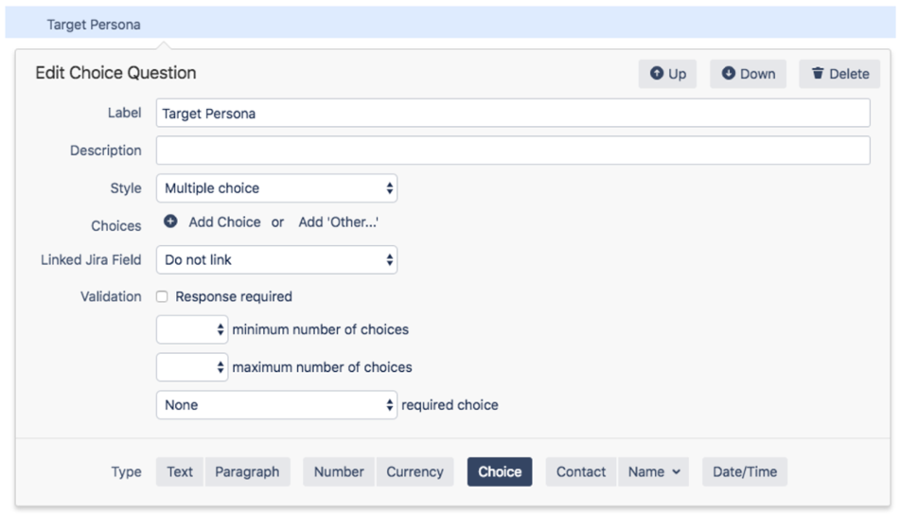
4. Now return to the form builder and open the form. Go to each of the form fields associated with a custom field you want to eliminate and unlink the Jira field. Remember to Save.
5. The populated form field is now independent of the Jira custom field. To verify that you have completed the process, run a JQL query for [custom field] NOT EMPTY. Then download a form response spreadsheet and compare the results.
6. Once you’ve confirmed that the forms contain the custom field contents, you can delete the custom field following the directions here.
We recognize that this is a labor intensive process and we are working to develop an automated process for converting fields in large projects. Please contact ThinkTilt if you would like to be notified when that functionality is released.
**Note that the process described above is for traditional Jira projects (Business, Service Desk or Software). ProForma is not yet fully functional with Next-gen projects.
Pingback: 7 Custom Fields Every Jira Application Needs - Strategy for Jira®